Monday, December 23, 2013

Regimentals: Battle for San Martin

Continuing a campaign from earlier in the year, in which JD and Chris participated in, we have JD's Dwarven prince returning to his sponsors towns, while Chris's Cynheid remian in the Northern areas of Helos. If you'd like to see some of their previous exploits you might want to check out the AAR written by Chris on his blog here...  Sippin' on Paint Water, in which a recon force of Chris' Human Cynheid troops, with the Dwarf regiments of JD's in tow, save Prince Torum (JD's main character).

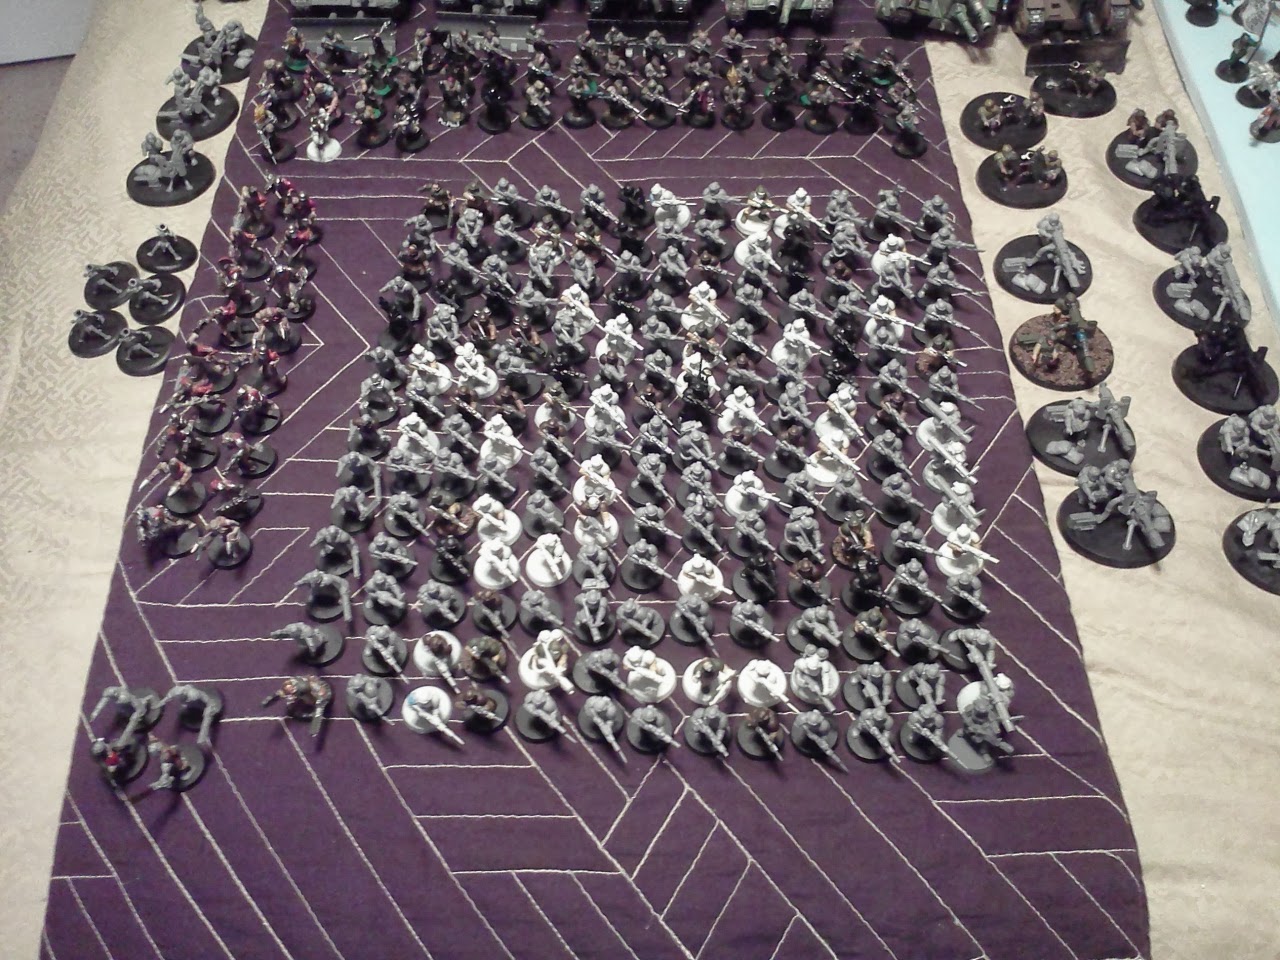
After the success of that battle, the two split their forces. With JD heading south to the Dwarven Demilitarized Zone...

Upon arrival at the town of San Martin JD learned about Orc recce troops, probably hearkening  a new Orc offensive pressing at the cities holdings in the surrounding countryside,  desperately coordinating a plan with a local Alliance artillery base, JD opts to defend the town from the oncoming Orc soldiers.

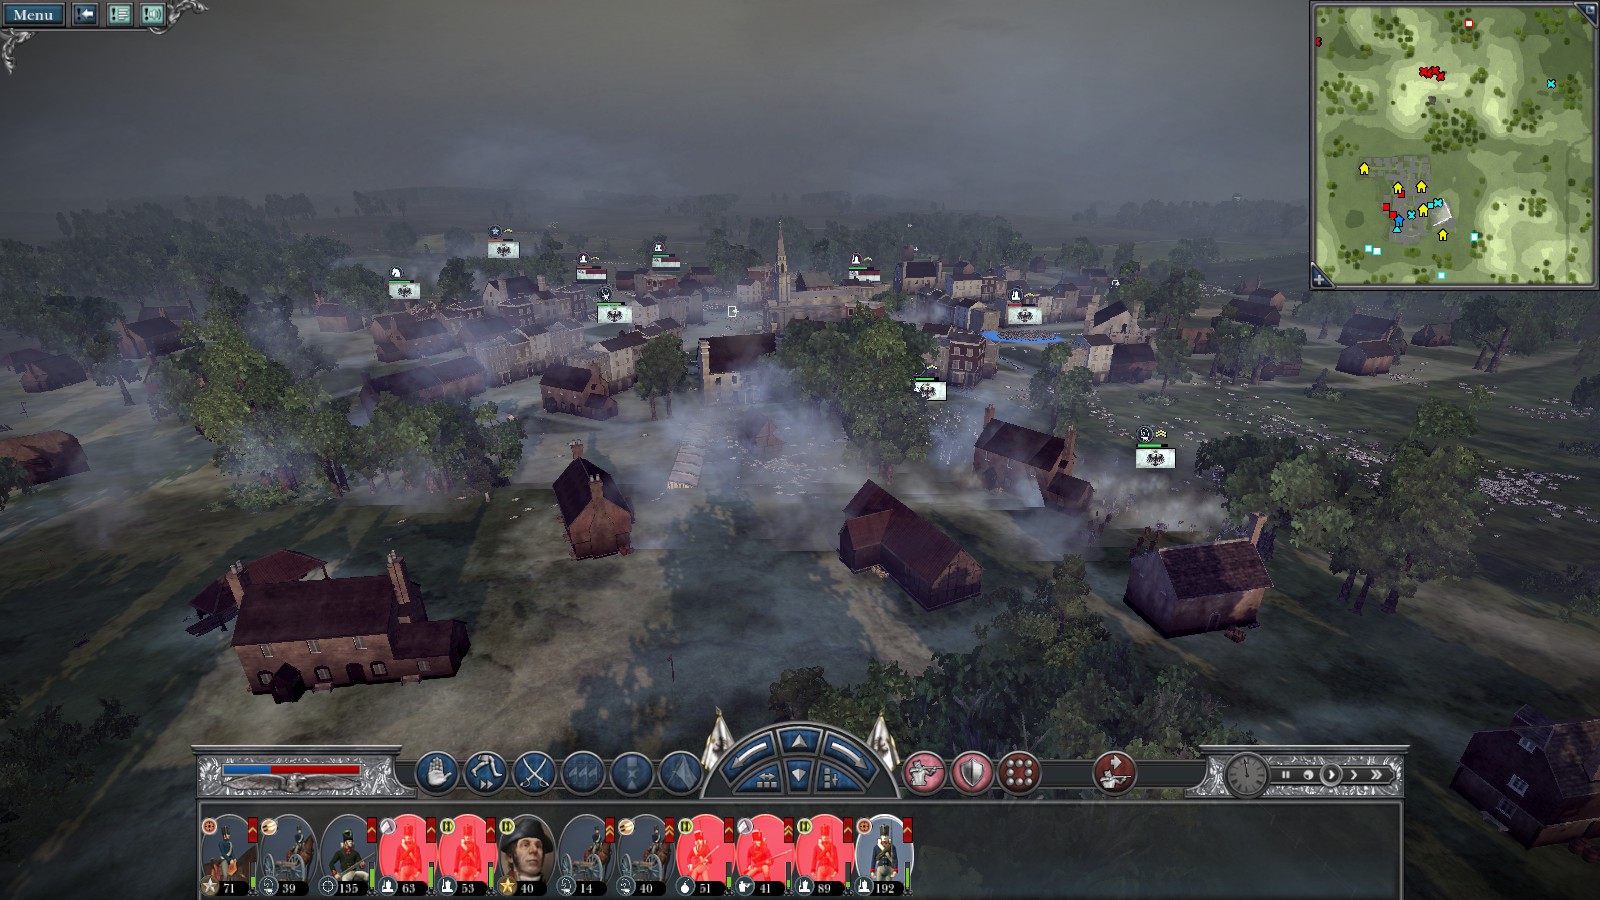
Positioning a handful of lookouts in the Town halls observatory, They call out possible movements in the dark night as the Orcs draw nearer 


The first scouts draw up to the edge of town


Blips and Orc scouts appear heavily in the south side of town


A Orc terror squad sneaks past the blips in the northern side of town, and sets fire to a building, Dwarfs from the "Paladins of Orerock" rush to secure the area.

members from the train of walking wounded, coming from the south side of town, into the hospital.


Things begin to get hairy in the south as the sheer bulk of the Orc onslaught starts to present itself.


The riders JD had sent to the Alliance Mortar base, arrive, to give Torum word that the base commander agreed to send a barrage to the town.  It would now be a race to get the Dwarves free of the barrage area, and keep the Orcs out of the town at the same time.

The riders, charge headlong into the melee to relieve pressure on the beleaguered spearmen.


The leader of the Cavalry (and second in command of the whole army)  Captain Mardak, orders his horsemen to fall back, as the freshly disengaged spearmen begin to reform outside the hospital. 


Mardak, the Captain of the Spearmen, and a ranker from that same regiment hold off the Orcs to save their friends as the time runs down before the artillery hits.

Mardak, killing no less than 5 Orcs (an impressive feat) is able to gallop back to the freshly reformed dwarven lines,  just as the two spearmen are mercilessly cut down.


The Orc tide moments before the artillery hits home


With a cataclysmic roar, the mortar shells explode across the southern side of town, tragically some overshoot, hitting the town hospital, and a portion of the residential district.

Total casualties:

Captain Hellick (KIA)
1 Militia Ranker (KIA)
2 Militia Rankers (WIA) 
35 Orc Scouts (WIA/KIA/MIA)
73 Dwarf Civilians (KIA/WIA/MIA)


Aftermath:

The Orc terror squad that attacked in the north, voluntarily surrendered being met with being trapped in a burning building on being slain on the Paladin's Blades.  
From them the location of the Orc FOB. in Terisia was pried,  one was given to the citizens who beat it to death,   one was mercilessly tortured, and the other has been escorted to Alliance Military Intelligence Command outside Karmenac. 

Fires still burn in San Martin, but the Orc recon units have fallen back across the border... for now... and Torum is now scrambling to accumulate a force large enough to take the fight to the Orcs


------------------------------------------------------------------------------------------

This is of course a gross over simplification of several days of Roleplaying the democratic aspects and the troop movements involved getting to and following this battle. 

I discovered rather embarrassingly that i don't have nearly enough of a supply of fantasy buildings which i am currently attempting to rectify. 

Hopefully you found this entertaining, and is usual with posts about Regimentals...

here is the link to my wix site with the PDF for the rules only on it, Regimentals Download Link


If you like what you saw, and enjoy the rules, have suggestions for those rules, or just questions about anything concerning Regimentals.

Please don't hesitate to email me at  impcommander@gmail.com


A quick drawing of Mardak's Stand


Thanks for reading!

-Your Favorite Madman-


Friday, September 27, 2013

Assemblage of The Pilgrims of Rust

I recently purchased the IG of a friend of mine,  and added them to my pre existing Pilgrim forces. Which as you can probably imagine prompted me into a fit of naming everyone and assigning combat groupings.  But more importantly. It prompted me to do this...

This gentlemen...is what an Secessionist Army Looks like on parade march.


Here we have A "Alpharis" Company of the Yurien 3rd Armored. With Lt.Col. Laccarde in the Executioner at the Top Right commanding.   The Chimera serves as Company support for both squadrons, and shuttles repair teams, and ammunition to vehicles in the field.  The Basilisk's are part of the integrated structure of the company and are permanently assigned to Alpharis unlike Imperial Guard fighting formations.  


Here is Valkyrie "Goliath 1" which is assigned to the Rallen 14th.  and The Baneblade "Causeway of Brass" which is Col. Merda's (CO of the Yurien 3rd Armored) command tank 


Here we have the infantry from A"Aeirok" B "Ballnath" Company of the 14th Rallen, Phalanx 1 of the 1st Cyrian R.R. (Rapid Reconnoiter), the 1st/3rd Cyrian Militia Phalanxes.  The Quartermaster Troupe, and abominations from the Dark Mechanicus. 

Sentinels from the 1st Cyrian R.R. 


Infantry from Company C "Calte" 14th Rallen 


Heavy Weapons from the 14th Rallen

Specialists, and Col. Adan Roussef (CO of the 1st Cyrian R.R.) 

All army senior officers, junior officers, and army adjuncts. 

Veterans, from Yuria and Cyria

Core elements of the Pilgrims fleet


The entirety of the Pilgrim's Fleet


Hope you've all enjoyed this.

-your favorite madman- 


Monday, September 9, 2013

The Battle for Cleves. 1805 (Napoleon Total War)

I played a game of Napoleon Total War the other day, which was perhaps the most engaging battle I've played in a long time. i was so excited i decided to post it here for your viewing pleasures.

Now a quick aside. I'm running "Darthmod" which adds effects and makes the AI more difficult and a number of additional "realism" things.   I'm playing the campaign on Hard. which is the highest difficulty you can get without adding artificial bonuses to the enemy like additional health etc. Also, i'd like to apologize in advance for the large pictures, its the only way that i could get it for you to see them well enough.

To set the scene...

I'm playing as Prussia,  and I've only recently allied with the Coalition, and taken my first territories and begun technological expansion.  I'm massing troops in the Cleves-Mark, preparing for an invasion of the Batavian Republic, things are going well,  the Batavians suspected nothing and in fact were very friendly with us. (part of my deception campaign).    

But shockingly, the Dutch allied with Napoleon, and a titanic host of Batavian Troops crossed the border in to the Cleves-Mark.  I scramble soldiers all across Prussia, but it is no use,  my army of understrength veterans and town garrisons must hold off two grand armies of the Dutch!


Here you can see, the Order of Battle,  The Dutch have some 7000 fresh, inexperienced troops to my 5000 tired and blooded soldiers. 


 A View from the Garrison forces defenses, The Dismounted Dragoons were the Town HQ.  The culmination of the defense would be the church and the apartments around the cannons. 


The campaign army, marches in from the extreme left of the Dutch armies flank, some 5 minutes march from the city.  A desperate rearguard cavalry action is utilized to ensure the infantry and cannon make it to the city. 


Hoping to use their numbers against them, I deploy the Campaign army onto "Bulwark Hill"  to force the Dutch to flood in between and around the two defense centers. 


The Dutch send their first waves down the slope at us.

The Dutch Cavalry are the first to hit the forward trenches. 


The Boys on Bulwark Hill, see off several regiments of the Dutch Line. But the Garrison in the city is in serious danger of being drowned by Batavian regulars. 


The mines in the road detonate in the middle of a Batavian militia regiment, but still the horde of Dutch press forward. 


 a view from the cannonade into the smoke of the forward line


Prussian regulars hold desperately against the Dutch in the forward line


The forward line falters, and the Bulwark Hill defense moves down from the hill to sweep into the Dutch flank in the city to hopefully save the garrison there. 


The Garrison holds off against thousands of Dutch...


The Campaign army blitz across the field to relieve the pressure on the Garrison forces


The Dutch troops turn to face the more potent threat, and the battle turns into a desperate running fight from east to west as I push the Dutch out of my town. 


You can see the extent of how far the first onslaught pushed in before we ripped them out of the city. 


The Garrison HQ is attacked by nearly 300 Dutch Line Infantry, but the 90 some odd Dragoons hold firm and the Dutch are found wanting. 


A spot of good luck as several regiments rally and return to the fight


The cannonade, just before the campaign army arrives to reinforce them. 


the smoke clears as the first dutch wave is seen off. Prussia still holds the town!


I move my campaign army into the town into defense positions, and to mop up the remaining Dutch.


The resistance is still quite stiff in some places. 


To my horror, the Dutch reinforcement column arrives. nearly another 1500 fresh Dutch soldiers. 


As I reform into new defense lines, the Dutch cannons break open the skies with fire and smoke. a vast bombardment precedes the final Dutch assault...


The defense this time is more flexible, several regiments are to initiate a running skirmish line, leading dutch regiments into centers of defense where (hopefully) they will be destroyed. 
*note- there is only 15 minutes left in the hour long clock till I claim victory through attrition. 


A more complete view of the defenses.


The forward line, draws dutch militia into additional Prussian regiments.


A view from Bulwark Hill out towards the city, as the Dutch close for the final assault.


Dutch Militia fight with entrenched Prussians


HERE THEY COME !!!!


Fighting engulfs both sides of town


Swirling melee's begin all across the line


Overwhelming musket fire take their toll on the beleaguered defenders routing many regiments.  


The Dragoons still hold firm in the smoke and blood. as the timer begins to run down.


I've held for just under an hour at this point in the engagement. 


After an hour of holding against all odds. victory, (albeit a close one.) is Prussia's!


The final casualties.

Dutch-  4219
Prussians- 3521


I have only 1400 men to stop an army of 3000. Hopefully the reinforcements are able to get here soon...


Hope you enjoyed this,  if you liked it enough i'd be happy to do more of it.


-Your Favorite Madman-