Showing posts with label Inquisitor. Show all posts

Thursday, September 28, 2017

Jornath: Fort Behras


Fort Behras.

Fort Behras is the keystone defensive structure in the north of the continent of Manfredi-At-Prima, in Kula Provence. This structure has existed for generations and stretches all the way into the pre-Imperial history of the planet. During its extensive history, it has played various roles politically and culturally in the identity of the region.


The citadel that would later become known as Fort Behras was established after the system of pseudo-feudalism was introduced to Jornath several thousand years after the initial colonization effort occurred. Jornath in these times saw a great deal of inter-familial skirmishing, large national governments were not established, and so territorial control of prime agricultural land, mineral wealth, and other natural resources was almost constantly in a state of dispute. In Usamiljen, and the glacial plains fed by runoff from the Ctre Valley, this skirmishing was of a particularly elevated intensity. The perfect confluence of agriculture and local material wealth, lords and ladies from Guffmans Platz, and numerous surrounding towns sought to use an asset to hand to fully cement their families claim to the region. Three of these families, representing a coalition of northern mining interests concocted a bold strategy, risking everything these families redirected all of their peasant miners, onto the lone peak to the east of the Ctre Valley, and instructed them to put their skills to use in creating a vast network of hardened tunnels, effectively hollowing out the peak, and turning the mountain into the shell for an underground city. At first, the project seemed to be total folly to the other families of the region. The builders were quickly draining their coffers on what appeared to be a foolish mining enterprise. It wasn't until the first Huscarls moved into the completed mountain complex that the real purpose behind the project was understood. Familial alliances were quickly formed to oust the miner's coalition from their mountain fortress. The extensive tunnel works provided proof enough from initial attacks, impossible to predict the location from which attacks would come, attackers faced enfilade fire from hundreds of hidden bunkers and fire-ports. After the alliances found that conventional attacks would be little proof against the position, their forces withdrew and prepared to lay siege to the mountain. The siege of the miner's coalition lasted for nearly thirty-five years, the mountain was supplied with a reservoir drawn from natural freshwater aquifers, and underground horticultural complexes kept the garrison fed on staple crops. No major fighting erupted for the majority of this period. Sporadic skirmishing would occasionally break out, but no large-scale actions were conducted on either side. The siege would eventually conclude when the families in control of the mining coalition were placed in financial danger by careful posturing from the alliance of families in Guffman’s Platz, who forcefully bought out several transportation cartels that moved ore for the miners. Faced with bankruptcy, the mining families sold their mountain fortress to their rivals, ending the siege.
Within a generation of the siege’s conclusion, Jornath’s nation-states were starting to establish themselves. With much of the contestation of the earlier feudal period slowly fading, the fortress’ role as a military structure began to diminish. Faced with a sizable piece of real estate which now lacked a practical application, the families sought to apply a more domestic purpose to the land. It was decided in short order to turn the mountain to growing a mutation of grape known as the Behras Berry, which has a thick waxy skin and grows small. This makes it horribly bad for eating, but ideal for wine production especially in the foothills where the slopes funnel runoff water and minerals downhill. The tunnel networks under the mountain are the ideal environment to store barrels of wine to ferment, as it's cool and dark. All this combined with the proximity to the transit hubs in Guffmans Platz meant that within a handful of years the Fortress was producing sweet white wine for all of Kula Province to enjoy.
When the Imperium made contact with Jornath, the name “Fort Behras” was a common brand amongst the citizenry of the planet. In the codification of planetary landmarks by surveyors of the Administratum, Fort Behras had its name erased however, purportedly because the adept filing the listings thought that a defensive position named after a grape was terribly inappropriate, and so gave the location the designation Height-906, lumping it in with peaks several dozens of kilometers to the north. The families who owned the fortress took this in stride, in fact, finding it so entertaining that they put the designation on their bottles.
It was not until after the completion of the Horus Heresy, indeed after the scouring had come to a conclusion that members of the Munitorum began to exert pressure on the nobility to open up land for the creation of planetary defense structures to use in maintaining Imperial authority. Private business interests chafed under this pressure, the Heresy had barely affected Jornath and many of the planets noble families, national administrations, and cartel leaders felt that the planet would be better served continuing with the way things had always been. But no planet argues with the will of the Emperor’s administration for very long, and soon enough the foundations of bastions and orbital batteries were being poured all across Jornath’s surface. At Fort Behras, a deal brokered with the Munitorum’s representatives allowed production of wine to continue in the lowland areas around the exterior of the fortress proper and along the slopes of the mountain itself as curtain walls, barracks, and defensive positions were erected in sections around the site. The completion of the work created the base of the defensive structure seen on modern Jornath, a patchwork of vineyard squares separated by auxiliary roads linking various supporting sites such as rail yards, vehicle repair centers, and sensor arrays to the gates of the fortress. The fortress itself now surrounded by a mighty plastcrete wall, dotted with small gates to allow for various automotive traffic, and bolstered from each cardinal direction by sizeable defensive gatehouses that allow access to the interior for heavier vehicles.
The most modern change in the landscape of the fortress is the town of Saine Yeltsville, which began construction just before 741.M41 as a suburban area to serve as overflow housing for members of the garrison, vineyard workers and other laborers needed to tend to the Fortress’ previously mentioned ancillary sites. The suburbs grew ever larger, with the eastern approach to the walls consisting of winding clumps of small housing, and shops.
When Ork forces entered the system at the beginning of the War for Jornath, the fortress was largely in a state of unreadiness, much of the garrison were part-time reservists from Usamiljen and various cities of northwestern Kula province. Readiness drills, weapons tests, proper maintenance of hardware had all been conducted infrequently if at all, which meant that the fortress was woefully ill-prepared to act as northern kula’s primary defensive keystone.  Garrison commanders frantically recalled all the garrison cohorts and scurried to check that weapons batteries could still be summoned to function.  This lapse in readiness prompted pioneer units, and local cohorts under the direction of regional Tactica command, to create the Ctre Valley firebase hopefully to allow more time for the fortress to be brought up to operational condition.

By the time of the withdraw back to the staging areas around the fortress after Operation Remits Maw’s failure, the complex had organized its garrison and brought half of its defensive weapon systems online. The process of restoring the facility to function was being waylaid by xenos incursions on the Usamiljen Heights mechanicus outpost, limiting the number of techpriests that could be flown safely to Behras, past greenskin flakk positions or through contested skies. Therefore, when Orks under Warboss Krump pushed along the highways southward eventually smashing against the walls of the fortress they were met with less than the full strength of the positions capabilities. Enough to stall the beasts, but not anywhere near enough to obliterate them, leading in turn to the protracted siege of the fortress.

Wednesday, March 29, 2017

Jornath: The Green Summer


Similar to the earlier battles for Remits Maw,  I created a book of contextual missions to allow for other players within the Jornath Facebook group to play specific themed scenarios,  below I give you the first half of the scenarios from the book. These were designed to typify the sorts of engagements in the Guffmans-Platz front during and immediately after the surprise Ork offensive that occurred in the first year of the war.


DSCF2298.jpg


Missions.
  1. Fighting on the Line! - Archetypal Missions of the War.
    1. Trench Assault
    2. Jornathii Vindratus
  2. The Battle for Fort Behras - Web Campaign
  1. Dawn on the Walls
  2. Thoroughfare of Blood
  3. Wall of Martyrs
  4. Pinnacle of Absolution
  5. Fields of Brass


Fighting on The Line.


The Ork counter offensive of the first summer was, not merely a surprise,  it was also massive, stretching in excess of  600 km,  from the Central Ctre Valley, all the way into Northern Kula and the Usamiljin Heights.  The Bulk of the heavy fighting in the north saw the Imperium on the defensive. In some places, ancient lordly fortresses, bolstered by the mechanicus stood bristling with ordinance,  surrounded by kilometers of trench lines, minefields, void shield generators and protected by legions of conscripted Jornath citizenry. But alas,  this is the exception and not the rule, more often than not Cohort commanders or  Guildmasters would suffice with a fortified barn and a dozen meters or so of earthworks and emplaced weapons to hold back regiment strength Ork units.
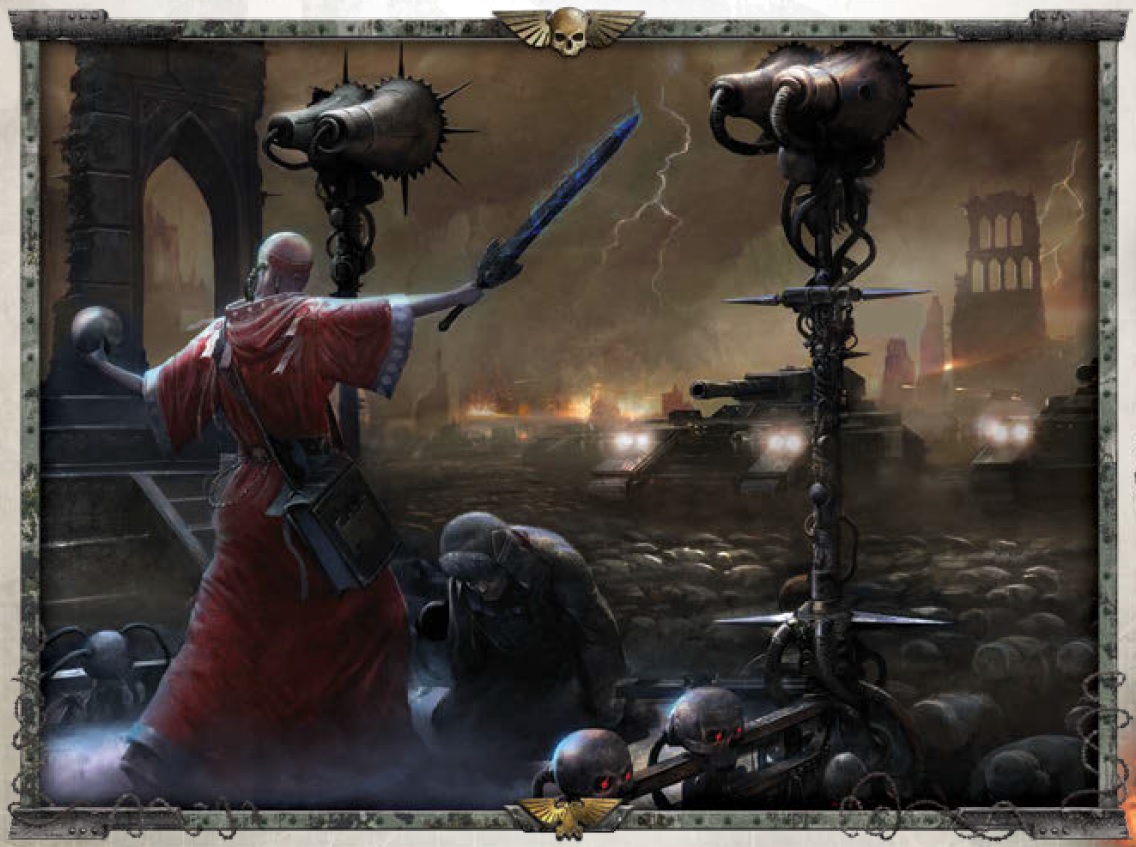
The Ecclesiarchy on Jornath  recorded over twenty two hundred priests and acolytes of the ministorum,  who died, of exhaustion, accidents or raids in the opening eighteen hours of the offensive.  Without the efforts of  the ministorum, it may have been impossible to give the conscripted soldiers the courage to die where they stood, buying time for the veteran reserves from the Kula combat zone to arrive and support the defenders.  The ministorum is a constant presence in the life of an Imperial citizen, from birth all the way until death, for many,  faith in the Imperial Cult can be a source of family, togetherness, and solace in a time of unremitting cruelty.  The Cult furthers the traditions and culture of the wider Imperium,  while its various planetary sects encourage worship of  planetary martyrs, and how the deeds of that planet's guardsmen play into the labyrinthine story of the Imperial faith.  So it was that on Jornath,  the priests inspired the masses of terrified conscripts,  huddled in sun baked trenches,  with tales of the glories of Jornathi heros, guardsmen, commanders, and knights.  The thunderous concussion of massed ork artillery punctuating the sermons, creating a symphonious harmony of death and faith, culminating in the two word litany of hateful defiance that would be the characterizing watchwords of the Summer.  “Jornathii Vindratus” Jornathi twinged High Gothic, meaning vaguely “In the Wings of Death, We Are Jornath”

Valhallans_Supplication.jpg


Trench Assault
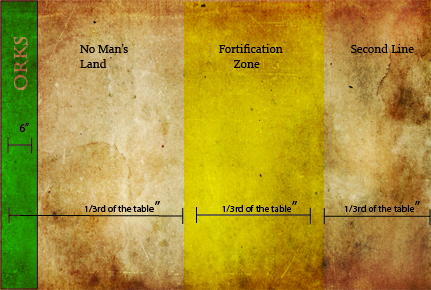
  1. The board is divided lengthways into thirds
  2. The Imperial(s) may place any fortifications and obstacles inside the fortification zone
  3. The Imperials deploy any of his troops, HQ’s, or Heavy Support units in the fortification zone, he doesn’t have to set-up all of them but he does need at least one.  The rest of his forces are in reserve.
  4. The Ork deploys all his forces in No Man’s Land, up to 6’’ from his table edge, any forces that will not fit are placed into reserve.  


Objective: The attacker must get as many units as possible into the ‘second line’ he will get  2 Points for every unit there at the end of the game,  while the defender will get 1 Point for every enemy unit not within his second line.


Special Rules:  
Fortified Position- The Imperials do not have to pay for any of their defenses, minefields, bunkers, sandbags, trenches, and bastions are placed from the players terrain collection.


Da Big Gunz’ - The Orks gain a preliminary bombardment, that they may use before the beginning of their first movement phase.  It consists of  D3 Large Blasts, with no ability to reduce scatter, hitting at Strength 3  Ap 6,  Pinning.  

mission 1a.jpg


Jornathii Vindratus
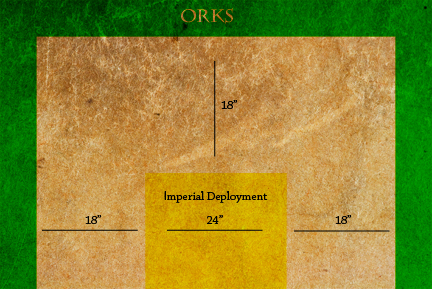
  1. The Orks deploy on one long table edge, and both short table edges,  18 inches away from the Imperial Deployment zone
  2. Any structures or fortifications should be placed within or immediately surrounding the imperial deployment zone.  While any craters or ruins should be placed in between both forces deployment areas.
  3. The mission is divided into 3 segments,  referred to as Primus, Secundus and Tertiarum,  the objective of the Orks is to wipe out or rout all Imperial forces as quickly as possible. While the Imperials are attempting keep their forces alive for as many turns as possible.
  4. Primus represents only the most early stages of the assault,  being turns 1-2,  while Secundus is turns 3-5,  and Tertiarum is 6+.   The game ends when all Imperial troops have been routed or killed.     

mission 1b.jpg


Objectives:  The Imperials “win” the game if they can survive until the Tertiarum stage of the attack,  the Orks will win if they can eliminate the Imperial forces before the end of turn 5.  


Special Rules:


Da Big Mob: The Ork force should be at least twice the total points of the Imperial defenders, it should be divided into two halves of equivalent points, with the second half arriving from the Ork table edges in the ‘Secundus’ phase.


The Battle of Fort Behras
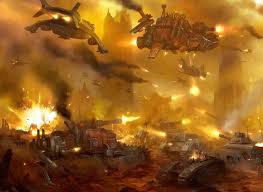
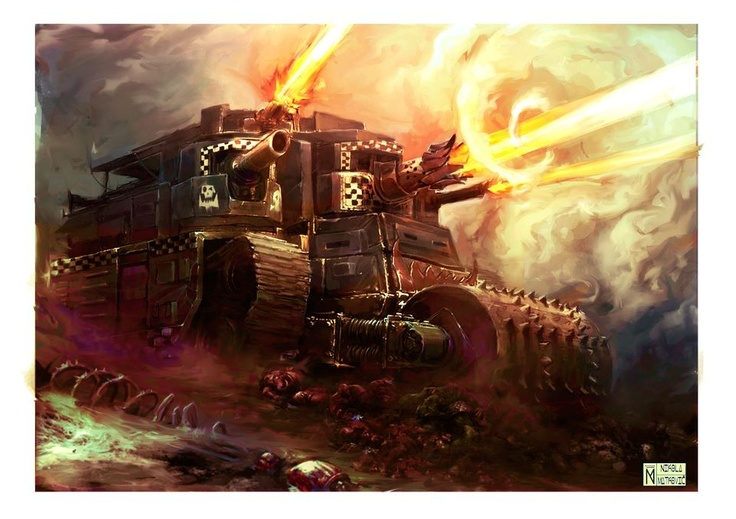
Under cover of precision raids by the Dreadmare Companions, Blood Angels, and White Scars, the Guffmans Platz cohorts of the J-PDF withdrew from the Ctre Valley to Fort Behras, and dozens of fortified bastions all across the defensive line separating the Ork held northern mountains and the critical rail lines, and population centres of the foothills. The Fortress represented the pivotal loadstone of the entire northern defensive network,  from here Jornathi units could be marshalled and supported with massive long range anti-air missile sites,  siege cannon,  and stockpiles of supplies.  Should the fortress fall, it would represent a catastrophic turn in the Northern campaign,  with the removal of a major strategic asset  for offensive actions,  and all manner of heavy ordnance potentially being looted by the aliens. Whether the Blood Axe Warboss Krump knew of the massive strategic importance that the Fortress afforded his adversaries or whether he just knew it would provide the most challenge in overcoming is secondary to the fact that his greenskins, would kick off the summer invasion with a vicious dawn blitz at the fortress’ walls.  The crucial nature of  the location, saw the Imperium’s finest cast into the fire to stymie the Ork hordes, what few veteran guardsmen the Guffmans Platz Cohort had, were located within the plastcrete walls of the fortress. Many fresh from the horrors of Remits Maw, had vengeful debts of scores of fallen friends, and the tear filled eyes of terrified Jornathi citizenry to fuel their defiant stand against the Xenos. The fiery contrails of hundreds of Imperial fighter craft duelled above the skies of Behras with screaming Blood Axe Fighta’ Acez,  and Skwadrons of Deffkoptas; as below in dust choked thoroughfares grinding looted wagons, stompas, and Kustom Mek creations, were smashed apart by Imperial Guard sapper teams,  plasma turrets,  and units of Astartes Devastators.  The fortress was built into the rock of Hill 906, an orphaned peak at the apex of the Ctre glacial valley, its white rock, hollowed out thousands of years ago, and replaced with miles of underground generators, command centers, factories and hab blocks. In effect a small underground city, with towering cathedrals of the immortal emperor serving as the entrance and exit way, all surrounded by criss-crossing processional avenues, drill squares,  artillery pits, and a 30 meter reinforced plastcrete wall replete with bastions. Every meter, the Orks took of the Fortress would be paved in the slick black blood of the alien.  

images.jpg


Dawn on the Walls
Credit: James Barr


Deployment: Long table edges. IG player can set up trenches and other terrain as desired in their deployment zone (18” in from their table edge). Spread craters, wrecked vehicles (from much earlier failed raid) and assorted other terrain in the remainder. IG set up first, up to 18” from their edge and place three objectives. Orks deploy second up to 6” from their table edge and go first. Space Marines are all in Reserve.

Special Rules:
Unexpected attack: Night Fight for first two turns. During those turns, IG units that are further than 12” from an Ork unit must pass a Ld check to move, run, or shoot. For this purpose roll for vehicles as if they had Ld8. If a unit is given an order, consider the check to follow the order the check to pass this as well; you do not have to roll twice to follow an order.


Counter Strike: All Space Marine units start in Reserve and gain Outflank. For all units that arrive on the same turn, the controlling player may elect to use one roll for all of them when determining the table side they arrive on. If an HQ model or a unit of bikers, scout bikers, or scouts are part of the outflanking units that turn, the combined roll may be re-rolled if desired.


Wake the guns: If at any point the Orks control two or more objectives, sector command will accept this as a serious attack and release artillery assets. After this condition is met, once during the game in their shooting phase the IG player may call in artillery support. This takes the form of 3 Basilisk shots (S9 AP3 large blast ordnance barrage, range unlimited). Do not reduce scatter by BS; use the full 2d6” but a HIT still applies. With dialed-in coordinates, they may be centered on any objective instead of on a model – if you do so you may re-roll the scatter if desired.


Victory Conditions: Each objective is worth 3pts. The Orks get 1VP for each Ork unit that exits the defender table edge. Defender gets 1VP for every two non-HQ Ork units destroyed, and 2VP for every Ork HQ unit destroyed.   

Campaign Outcome:


If the mission results in an ORK victory, the next mission played will be Thoroughfare of Death,


If the mission results in an IMPERIAL victory the next mission played will be Wall of Martyrs


Thoroughfare of Death


Deployment: Short Table Edges, extending 12’’.   With terrain being placed only 12’’ in from the long table edges. Order of Placement and 1st Turn is determined through roll-off.  


Special Rules:


Counter Strike: All Space Marine units start in Reserve and gain Outflank. For all units that arrive on the same turn, the controlling player may elect to use one roll for all of them when determining the table side they arrive on. If an HQ model or a unit of bikers, scout bikers, or scouts are part of the outflanking units that turn, the combined roll may be re-rolled if desired.


Triumphal Bastion:  All bastions purchased by the Imperial forces are free,  but reduced to a limit of 0-2, they must be placed parallel to the other on opposite sides of the road.  These bastions are each equipped with a twin-linked plasma cannon on top,  and 4 heavy bolter casements.  

Victory Conditions:  3 objectives are placed along the length of the board.  One each in the Ork and Imperial deployments, and one in the exact center of the table.  The force that commands the most objectives at the end of 6 turns is the Victor.

Campaign Outcome:


In the event of an Ork victory the next game will be Pinnacle of Absolution


In the event of an Imperial victory the next game will be Fields of Brass


Wall of Martyrs


Deployment: Imperial forces may deploy anywhere within the boundaries of the fortress, including on the walls.    Ork forces will deploy in 6’’ from the table edge(s) opposite the fortress wall.


Special Rules:


Fortress Walls: The Imperial player(s) place a piece of impassable terrain that must at least encompass a 12” square area.  But may at its largest bisect the table at its centre. The Fortress Walls are  Armor Value: 14   with 3 Hull Points, and can be attack in 6’’ sections.


Killtower: An Ork motorized siege tower, the Orks start the scenario with 2 free such vehicles with the following profile. And have a disembarkation point of equivalent height to that of the fortress walls.
Vehicle,  Assault Ramp,  2x Big Shootas
Transport Capacity:  20
Armor Value:
Front : 14     Side: 14     Rear: 10    HP: 3


Stymie the Gap: Imperial Guard troops fighting on an area of destroyed “Fortress Walls” is Fearless

Victory Conditions: The Scenario is determined through Victory Points,  with Victory Points being determined through the points cost of enemy units killed.

Campaign Outcome:
In the event of an Imperial victory,  the Imperium wins the Battle of Fort Behras


In the event of an Ork victory, the next game is Thoroughfare of Death


Pinnacle of Absolution


Deployment:  The Imperials deploy within two 10’’ squares, whose center is 1 foot in from the short table edges. The Orks will deploy 6’’ in along one of the long table edges.  Any Orks that cannot fit are placed into Ongoing Reserve.   Any Imperial forces from Codex: Astra Militarum, or  Militarum Tempestus, not in a Valkyire or Vendetta Gunship that cannot fit are considered destroyed.   Those within these vehicles,  or from the space marine codices are placed into Ongoing Reserve to arrive via deep strike.


Special Rules:


Flower of the Emperor:  At the center of each Imperial deployment zone sits the control panel for one of two Sanctioned Nuclear Warheads. They are ticking down, to prevent the Orks from claiming the resources of Behras, hopefully purging thousands of Xenos in the process. The arcane machineries of the ancient weapons are painfully delicate, and require the ceaseless ministrations of their sworn caretakers, all the way up until the seconds before detonation, Therefore, The Orks Cannot be allowed to destroy the panel or its operator.  


Victory Conditions: The Orks must obtain an “Objective Secured” on both of the control panels described in “flower of the emperor” The Imperials Must prevent this for 5 turns. At the end of Turn 5 the game immediately ends.

Campaign Outcome:
In the event of an Imperial victory,  the Battle for Fort Behras is a Strategic Draw


In the event of an Ork victory, the Battle of Fort Behras is an Ork Victory.


Fields of Brass


Deployment:  Played either on the floor or on multiple tables,  the playing space should be approximately 8 x 12.   Ork and Imperials deploy 12’’  in from either short table edge.


Special Rules:


Tank Warfare. All Infantry units that can take an dedicated transport vehicle MUST take them, or they are not allowed to be utilized in this mission. At least 50% of the forces total points MUST be spent on units with the vehicle unit type.


Victory Conditions: The Scenario is determined through Victory Points,  with Victory Points being determined through the points cost of enemy units killed.

Campaign Outcome:
In the event of an Imperial victory,  the next game will be Wall of Martyrs


In the event of an Ork victory, the next game will be Thoroughfare of Death


Sunday, October 30, 2016

Jornath 40k: Kula

Location:   Kula, Kula Province

Country: Manfredi-At Prima
Province: Kula Province

Population: 4.5 Million

Kula is the capital of Kula Province, the largest civic and maritime producing region in the nation of Manfredi-At Prima along the Imperial World of Jornath’s Northern Hemisphere. It is the focal point of the opening stages of the Battle for Jornath.

History: Kula was founded 3,500 years after initial human settlement on Jornath, springing to life at the confluence of the bountiful river systems flowing in from the coast. It was a combination of numerous agricultural facilities, communications outposts, and minor maritime ship crafting factories. For several generations Kula gathered regional influence, through the petty feuding of local Lords or Kings, it even purportedly enjoyed a brief time as the capital of a regional kingdom. Though much of the information and histories of this period were lost during reunification, with the Imperium of Mankind.  After the Legiones Astartes departed, vast caravans of interplanetary traders, artisans, and the enigmatic tech-priests of Mars, flooded the planet, Kula was one of many cities on Jornath to benefit from the technologies of the wider Imperium. Already a truly labyrinthine metropolis,  the advanced building capabilities and solutions that the techpriests offered turned Kula into North-western Jornath’s first Hive city,  though a meagre hive by comparison to other worlds, Kula’s reputation terrestrially, as a beautiful river city, a place of business, art and mercantile power was amplified a thousandfold.  Soon the Patrician Families from Guffmans-Platz, to Oakenzid and even further south were scrabbling, bribing, and scheming to control the “River Jewel”. This reached a head several years later, during the outbreak of the Horus Heresy. The Genntim Family, with the backing of the Black Cross Shipwrights Union, and a notable supporter of the Warmaster’s cause, (Addolense Genntim, the family patriarch seemed to believe the burgeoning Church of the Emperor was being encouraged rather than dissuaded by the Emperor) marched into Kula’s southern civic basilica, with a few dozen well armed retainers, and began shooting.   The Genntim Massacre, solidified Kula Province in the name of the Warmaster; echoing similar scenes across the planet, and indeed the galaxy as Chaos tore at the soul of the Imperium.  Fortunately, the Traitor’s did not hold Kula for long, thanks in large part to the commander of the (then infantile) Kula Conservator Cohort, Euclid Kinnell, who remained loyal to the planetary governor’s ( an Ultramarine Administrator and Advisor) final order to maintain the Imperial Truth, as laid down by the Master of Mankind himself.  The Kula Conservator Cohort, was at this time billeted several kilometers outside hive spire,  in the Indigo Sparrow Dockyards, Euclid rallied his men, and marched to the southern civic basilica, encountering traitor union men from Black Cross, and mustermann from House Genntim. Eventually the K.C.C.  battered their way to the civic basilica, and therein forced the Genntim families surrender, under pain of having their name expunged from the noble enscrolle of Kulaian Families, a threat worse than the death of each member of the family. Since that time the people of Kula hold loyalty, and pride of arms in high esteem,  the path of the KCC’s march to save Kula’s soul from Heresy is now immortalized and is a must see for any pilgrims to the area,  beginning at the Indigo Sparrow Dockyards (now the regional command center for the planetary defense forces) and ending at the Cathedral to Saint Euclid the Loyal.  

Geography: The Hive city of Kula covers an area of 1567 km,  and sits only slightly above sea level,  the city itself is criss crossed by rivers, tributaries and lakes, which sparkle with the millions of lights from the city, which is divided into 27 districts. The land around the city is marshy, and nutrient rich,  covered in agricultural complexes, fisheries, and swamps.

Military: About 5% of the population is permanently enlisted into the Kula Conservator Regiment, which equates to roughly 225,000 fighting men and women.  Which is broken into 10 Regiments of 22,000 Armsmen apiece with a single 5000 Armsmen mechanized regiment.  Basic equipment is fashioned in the Cadian style, but with a bent towards the finery and circumstance consistent in traditional Jornathi battledress. The Cadian Flakhelmet Mk XI, is an expensive and highly technical piece of equipment, which can be difficult for less disciplined or less technically inclined personnel to maintain efficiently,  the Jornathi Defense Forces meeting both of these criteria, the optionable alternative chosen by many cities on Jornath, is the Alar-Median, Slatthelm K1,  which, offers a similar weight and protective capability to that of the Cadian Mk XI, but does not include the Vox interface or advanced user HUD, or sensory deadening suite.  In terms of Body Armor, Jornath sources from Antax, Alar-Median and Tolkhan.  Kula chooses to take from the Tolkhan Dura-Curiass 023, which takes the Cadian style flakvest, removes the shoulder plating, and alters the sensory and trauma response systems to maintain operation at peak efficiency under water, or in highly damp conditions, but it suffers from decreased performance in high-dust situations, it offers similar impact resistance. The Kula Conservator Regiments, use the M36-C Kantrael Pattern Lasgun, for the carbines obvious benefits in naval operations.  The Regiments use the Chimera Armored Personnel Carrier as its chief combat transport,  the Helstannon “Intrepid” Carrier, for both hauling equipment and most terrestrial troop conveyance. The Chief combat vehicle for the KCC units, is the Leman Russ Battle Tank


This has been a detailed look at one location involved in the Battle for Jornath.

-Your Favorite Madman-